Running an AI model
In this tutorial you will load an ONNX model into a graph, feed it a texture, and display its output. The example is a monocular depth model, but the pipeline is the same for any image-to-image model: segmentation, super-resolution, style transfer.
The interesting part is not loading the model. It is the conversion either side of it — Vulkan textures and CUDA tensors do not share a memory layout, and getting that mapping right is most of the work.
Budget about 30 minutes.
What you need
- The ONNX, tensor and CUDA packages. No published bundle includes them yet — install them
with
nodos install; see Manage packages. - An NVIDIA GPU, if you want TensorRT. ONNX Runtime will fall back to other execution providers without one.
- An ONNX model file. Anything ONNX Runtime 1.16 supports will load.
- Your first graph completed.
Step 1: Load the model
Right-click the node graph and add an AI Model Loader node, under ML → AI Models.
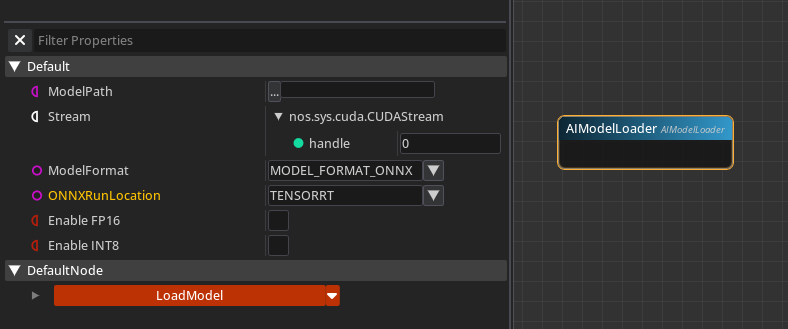
Set Model Path to your .onnx file, then choose an ONNXRunLocation. TensorRT with FP16
optimisation is the right default for most models and the fastest by a wide margin. Not every model
converts cleanly — if it fails, the load fails loudly and the Log pane explains why, at which
point fall back to another execution provider.
Set the Stream pin before loading
For a fully asynchronous GPU inference pipeline, connect the Stream pin before clicking LoadModel. It is read at load time; setting it afterwards has no effect until you reload.
Click LoadModel.
Why the first run is slow
TensorRT optimisation takes time. For models with dynamic input or output — any dimension
reported as -1 — it cannot even start until it knows the real input shape, so it runs when
you first connect an input. The node reports Determining Output Tensor Info... while this
happens. This is expected, and it is cached afterwards.
Step 2: Inspect what the model wants
Connect the Model pin to an ONNXRunner node. It reports the model's inputs and outputs.
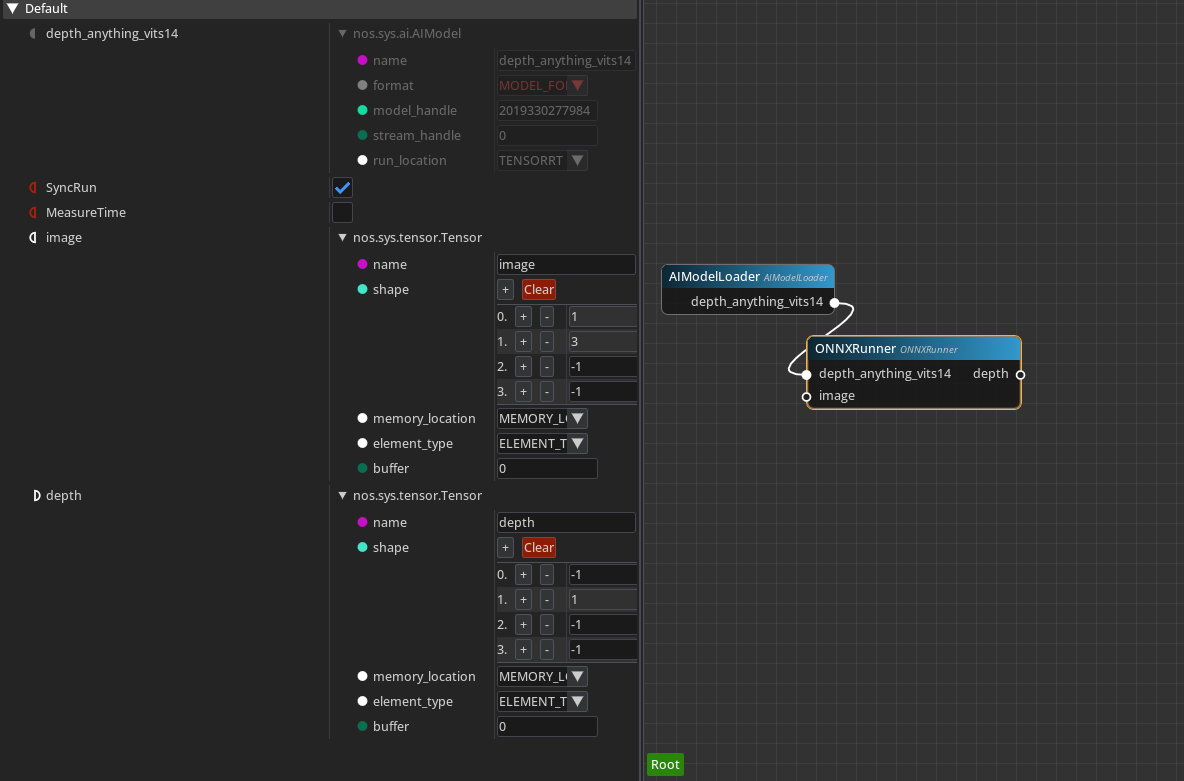
Here the model takes an input tensor named image with shape (1, 3, -1, -1) and produces depth
with shape (-1, 1, -1, -1).
Read that shape carefully, because everything downstream depends on it:
1— batch size.3— channels. Three, not four: this model wants RGB, not RGBA.-1, -1— height and width, dynamic. The model will accept whatever you give it.
This ordering — batch, channel, height, width — is NCHW. Textures are naturally NHWC. You will have to convert.
Now check the element type. Select the tensor pin and look at its element_type field.
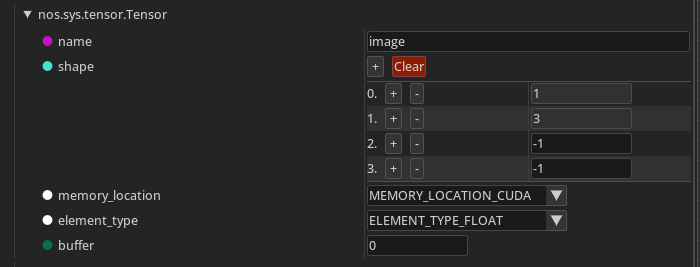
It is float — 32 bits per element. Your texture has to match.
Step 3: Convert the texture to a tensor
Three things must line up: the element type, the channel count, and the dimension order.
Fix the element type
Add a Texture Format Converter node and set OutputFormat to R32G32B32A32_SFLOAT. That
gives you 32-bit floats per channel, matching the model's float element type.

(If your source texture is already R32G32B32A32_SFLOAT, you can skip this node.)
Convert to a tensor
Add a TextureToTensor node and connect the format converter's output into it.
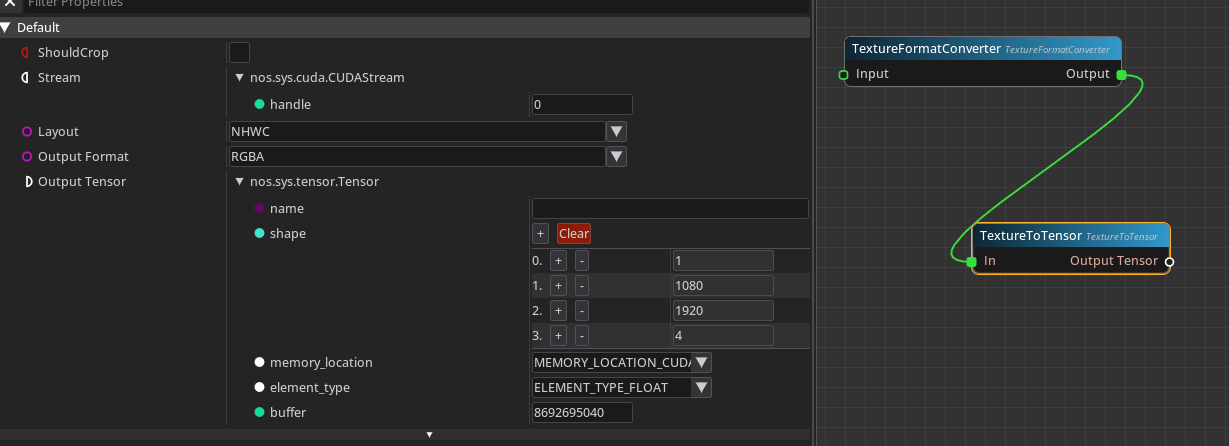
By default it produces NHWC with four channels. The model wants NCHW with three. Change both:
- Set Layout to
NCHW. - Set Output Format to
RGB.
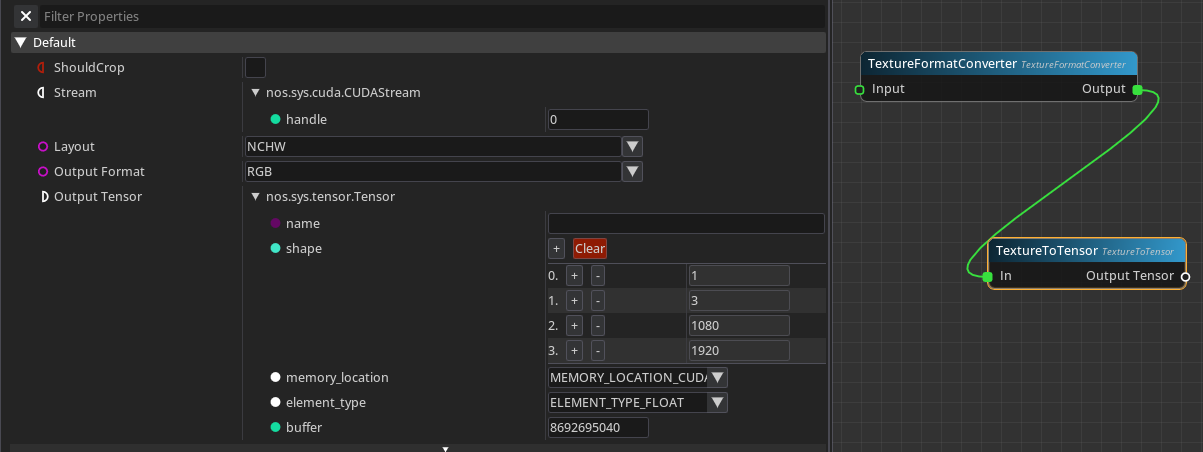
The output tensor now reports (1, 3, 1080, 1920) — batch 1, 3 channels, and the real height and
width of your texture. That matches (1, 3, -1, -1).
Step 4: Run inference
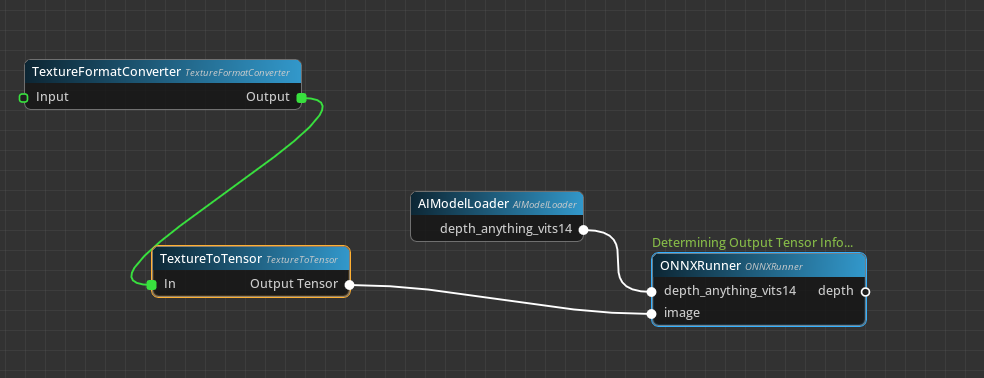
Connect the tensor into the model's image input.
If the model has dynamic dimensions, this is the moment TensorRT optimisation actually runs, since it now knows the concrete shape. The node reports its progress.
Step 5: Convert the output back to a texture
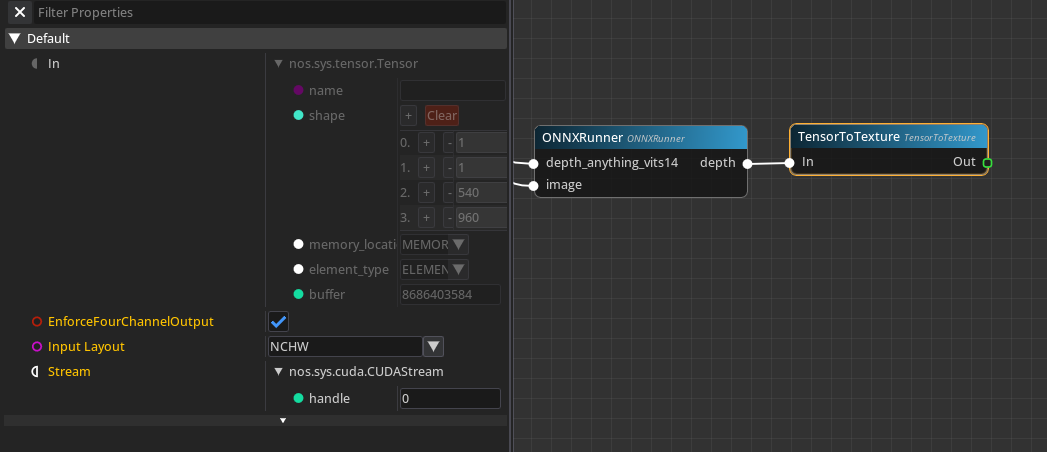
Connect the model's depth output to a TensorToTexture node, and mirror the settings you used
going in:
- Set Layout to
NCHW, matching the model's output. - Enable EnforceFourChannelOutput. The depth output has a single channel, and displays expect four.
Wire the resulting texture into whatever you want to display it with, and attach the path to a Thread and a Sink.
You now have a running real-time depth pipeline.
Step 6: Measure it
Before you tune anything, measure. On the ONNXRunner node, enable Measure Time. Then open the Watch pane and observe:
ONNX Runner Elapsed TimeONNX Runner AVG Elapsed Time
Both are in microseconds, and both are GPU time.

What you built
graph LR
    T[Texture] --> F[Texture Format Converter<br/>R32G32B32A32_SFLOAT]
    F --> TT[TextureToTensor<br/>NCHW, RGB]
    TT --> M[ONNXRunner<br/>image → depth]
    M --> TX[TensorToTexture<br/>NCHW, 4-channel]
    TX --> S[Sink]
The reusable lesson is the shape of the pipeline. For any image-to-image model:
- Read the model's input tensor: element type, channel count, layout.
- Convert the texture's format to match the element type.
- Convert texture to tensor with the model's layout and channel count.
- Run.
- Convert back, padding channels if the display needs four.
Only the numbers change between models.
Next
- Use the Vulkan subsystem — if you want to write your own GPU nodes around this pipeline.
- Objects and the type system — why textures and tensors are passed around as object references rather than copied.